Why does my project take so long?
- Mike Bechtold
- Jan 1, 2025
- 5 min read

Updated: Jan 20, 2025
This is a part-time gig, where I'm available during nights and weekends. Additionally, I have a full-time 40-hour job, and I attend school two nights a week in both the fall and spring. I also have wife, and three kids.
A typical project progresses through these stages: purchasing materials, cutting and milling, drilling or biscuit cutting, sanding, assembly, personalization, finishing, and pickup or delivery. We usually move a group of projects through these stages simultaneously to maintain a consistent pace. Additionally, due to space constraints, we can't begin cutting or sanding a new project while another is in the finishing stage. This helps prevent contamination between stages.
Generally, due to space constraints, we can manage around three large projects, such as two sets of bunk beds and a desk. Alternatively, we can handle multiple smaller projects simultaneously or a mix of different sizes.
We also operate an Etsy business, focusing on smaller projects like stove covers, cup holders, and coffee racks. Some of these items are usually available in stock, ready to be finished, while others, like stove covers, are partially built and await custom sizing. These projects are integrated with our larger projects.
When winter arrives, it can become quite cold outside, sometimes excessively so. I use a small propane bullet heater to warm my shop, which is a two-stall garage. Achieving a reasonable working temperature, around the 50s, can be challenging. This is likely because the space is only partially insulated and has a large 16-foot garage door that lets a lot of heat escape and cold air enter. When the temperature outside drops below zero, heating this space becomes difficult. Sometimes, it takes several hours to raise the temperature into the 50s, which means on a weeknight, it might take over 2 hours, leaving me with only about 1 hour of working time. It doesn't seem worthwhile to attempt heating the garage.
Buying materials
This involves a visit to The Home Depot, Menards, or a specialty wood store. We are currently deciding between two specialty wood stores, Wood from the Hood and Iverson Hardwoods, where we usually purchase wood for cutting or charcuterie boards. Recently, some of my larger projects, like desks and sofa tables, have been constructed from woods other than pine.
Cutting and Milling
Part of cutting and milling, we start with the miter saw station cutting the lengths.


Some projects consist of panels, multiple parts glued together. In this case we will move on to using the milling station to clean up edges on materials and plan the thickness to get them uniform.


In the case of panels or some other projects require me to use my table saw to cut the parts to width.
Drilling or cutting biscuits
When the project get to this stage, sometimes pocket holes are needed to join part together. and in some cases biscuits are used to join panel together when pocket holes are not desired.


Gluing up panels
At this stage we are either using pocket holes to hold part together or clamps.


Sanding
This is the exciting stage. Well, not exactly. Here, we contemplate life's decisions and dream about the future. Things can become messy at this point, but we believe we have an effective dust collection system in place for now. We proceed through three stages of sanding based on the material, starting with 60 to 80 grit paper using either an orbital sander or a belt sander. Here are some of the tools we use for our sanding process.


We preform this operation to the panels that have been drying overnight. Once everything is smooth, we proceed to the next level of sandpaper, 120 grit. If the final finish involves painting, this step completes the process. However, if staining is needed, we will progress to 220 grit paper, achieving an exceptionally smooth finish. If there are any imperfections or gaps in the wood, we fill them with wood filler and sand them later. We use quick-drying filler that changes color, making the process much smoother.
Assembly
This is genuinely the enjoyable part. Here, you witness the projects coming together. We utilize clamps, screws, glue, and a variety of other accessories to assemble the project.


Once the project assembly is finished, we will fill in any unwanted holes in certain cases. Some holes are intentional as part of the design. After that, we can proceed with rounding the edges and the final sanding.


Personalization
We offer three methods for personalizing the project. They include:
Using a circuit to cut vinyl,
Using a laser to engrave,
Using a CNC to cut patterns into the project.
Personalization usually occurs as part of the finishing process. If the CNC or laser is used, the project is typically stained, and then the engraving is painted or stained in a different color. If vinyl is used, it is applied after polyurethane has been applied and cured for 24 hours.
Finishing
Certain indoor projects are stained, painted, or both. We often prefer the combination of espresso and white base colors. Check out the examples of color selections.
Stained - Interior
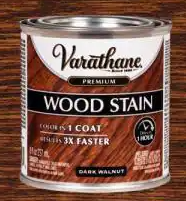
Depending on the type of wood and stain, pretreatment might be necessary. The initial coat of stain should be applied within 30 minutes. After 2 hours, a second coat can be added to cover any missed spots and potentially darken the final color. Some newer stains do not require pretreatment and need only one coat. These are usually faster drying and darker on the first application.
Once the final layer of stain is applied, we will begin applying the polyurethane finish. We usually opt for a clear matte finish. Most of my finishes are sourced from The Home Depot.


Stained - Exterior
In this process, we utilize a sprayer to apply the finish. We generally use Behr's Cedar Tone, Chocolate, and Redwood. These can be found at The Home Depot.


Painted
At this point, we have two options for applying the paint: using a sprayer or a brush and roller. We generally favor the brush and roller method. This approach seems easier to manage and much less messy. Additionally, we lack the interior space for a spray booth. Previously, it felt like more paint ended up on everything else (mostly on me) than on the actual project.
Distressed
To achieve a distressed finish, start with a darker base coat, such as gray or black, or sometimes a stained espresso. The next layer should be a lighter color, typically using white or cream chalk paint. After the paint has dried completely, sanding will give it a distressed appearance.
Pickup, delivery or Shipping
At this point, we discuss with the customer their preferred method for receiving their project. They have the option to visit our shop to pick up their projects. Additionally, we offer delivery and shipping for an additional charge. We provide delivery services within a 100-mile radius of our home base in Brooklyn Park. Shipping is generally available for smaller items like stove covers, cup holders, and coffee racks, which are usually found on our Etsy store.


Comments